المُلخص التنفيذي
As we learned in the Developing Innovative Solutions I factsheet, adopting a User-Centred Design while developing your projects enables you to focus on delivering an innovative needs-oriented solution to solve complex problems. It also allows you to develop new strategies and drive change towards a more sustainable and water-secure world. A User-Centred Design can be used by anyone, from students to professionals, to develop projects that address a specific problem. In this factsheet, we will continue exploring this participatory approach by giving you detailed information on its five different stages: Empathise, Define, Ideate, Prototype, and Test.
a) User-centred design stages
In the Developing Innovative Solutions part I topic we already introduced the five different stages of a user-centred design process which include: Empathise, Define, Ideate, Prototype, and Test. Remember however that this approach is not a linear process that will necessarily run in a sequential manner. The five stages can either run in parallel, sequentially, at random, or even iteratively, whereby different steps are stuck in a loop until your project develops its final viable, feasible, and desirable solution (DAM & SIANG 2021)(Figure 1).
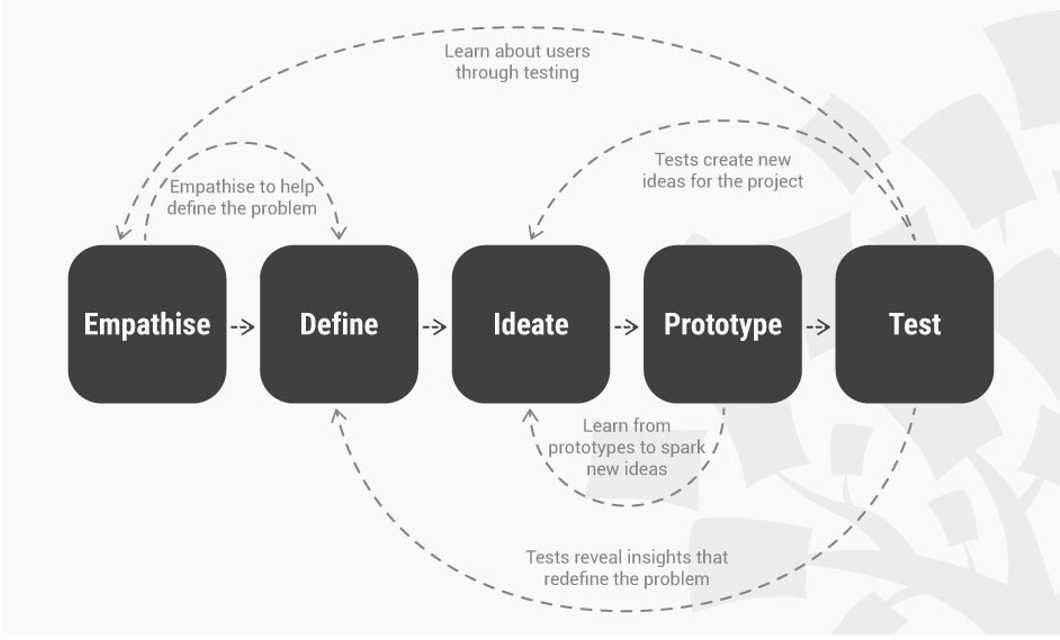 Figure 1: The five stages of the user-centred design process
Let’s dive straight in and learn more about the first stage: Empathise!
The user-centric design thinking process starts with analysing the problem you would like to solve by empathising with your end-users. Developing user-centred solutions without the empathise stage would be almost impossible. The empathise stage is critical for building a bridge between your potential target group and you as a developer by putting aside the individual biased assumptions you might have, developing a deeper understanding of the various dimensions of the problem, gaining first-hand insights into the actual problems the end-users want solving, and assessing the strengths, weaknesses, and availability of resources which may be relevant for your future project.
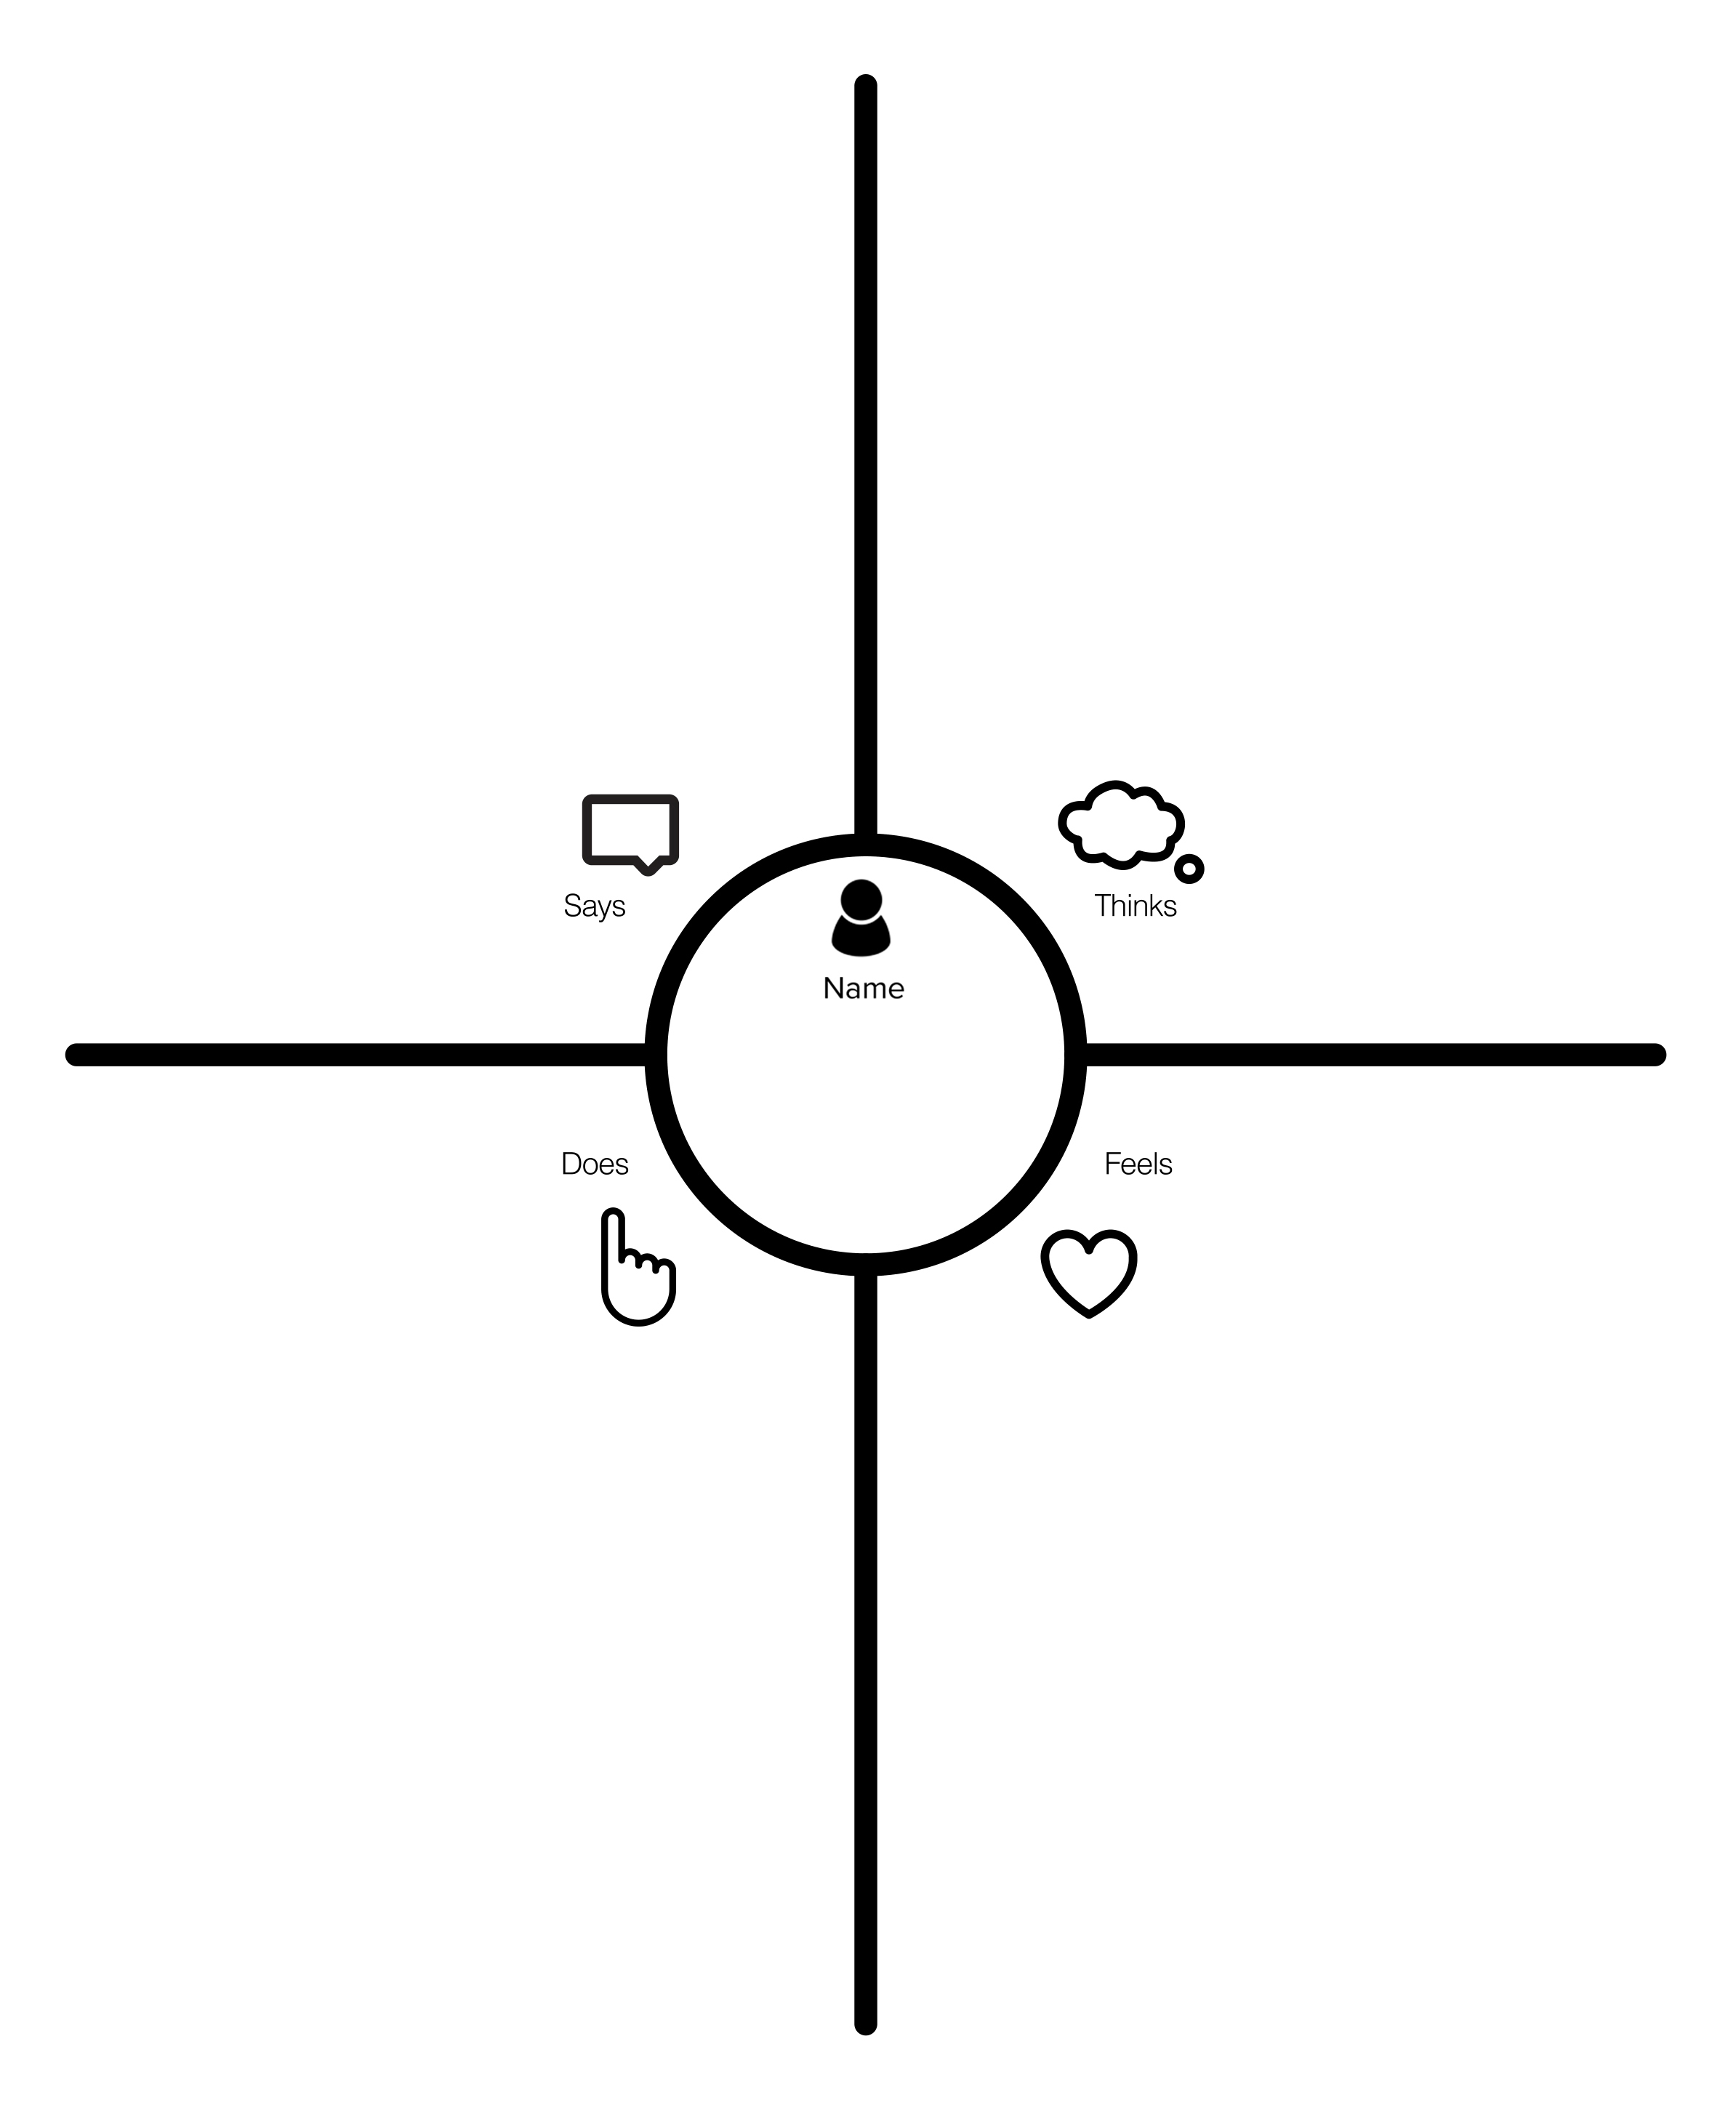
To achieve this, you should start by fully understanding the problems that your end-users might me having. You can do this through desk-based research as well as directly engaging with your potential target group to understand their struggles, context, environment, needs, and aspirations. You can also consult with various experts from different disciplines related to water and climate sector to get fresh perspectives, ideas, innovations, and observations, etc., that can enlighten you while developing your project. Make sure you document all of this research to have it handy when designing your solution!
 Figure 2: Empathy Map
Download our worksheet to learn more about the empathy map and how to use it efficiently for your project.
Now that we understand how to collect the first round of information, let’s look at the next stage: Define!
After empathizing with your potential end users and collecting all the necessary information about them, it is now time to sift through this knowledge and make use of it. In this stage, you need to analyse your observations and information from different angles in order to synthesise the problem. Connecting the defined problem directly to the context and needs of the end-users is essential to ensure the success of your project and your developed solution.
But how can you as a young professional define your target group’s core problem?
This task might seem overwhelming at first, but there are various tools that can help you such as the Problem Tree. The Problem Tree is a tool that helps you map out the causes and effects of your targeted problem in a structured manner (Figure 3).
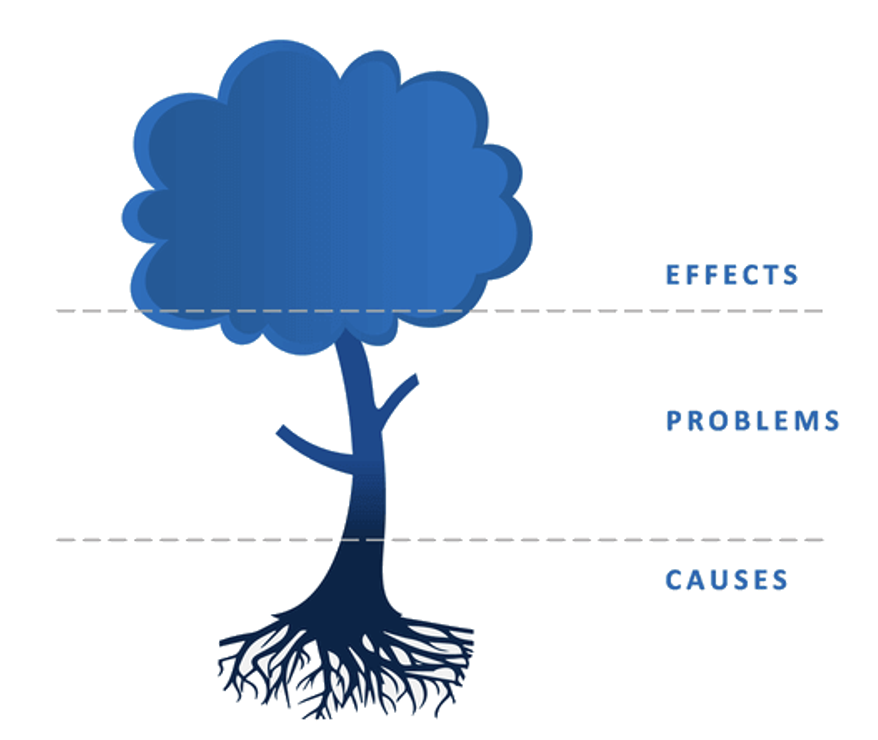 Figure 3: Problem Tree
Want to learn how to apply the Problem Tree when designing your project? Check out this worksheet.
The third stage is about coming up with creative and out-of-the-box ideas that will help you develop the solution to the problem you defined in the second stage. Ideation starts when you begin to reflect on the information that you have already worked with in the first two stages. You should come up with a wide range of questions while undertaking this task in order to consider all possible outcomes. These can include:
- What information am I still missing?
- Which findings conflict or contradict each other? Why?
- Do these findings present limitation regarding the potential solutions?
- How might I approach these findings? What kind of solutions would be interesting? … Etc.
Write down the answers to such questions and the ideas that may come up while answering them. Then organize an ideation session with your team, if you are part of one. If you are working on your own, reflect on these points multiple times with a few days in between in order to have a fresh perspective, and do not forget to plan meetings and discussion sessions with experts, consultants, and individuals from various disciplines and sectors who have similar interests or knowledge in your field.
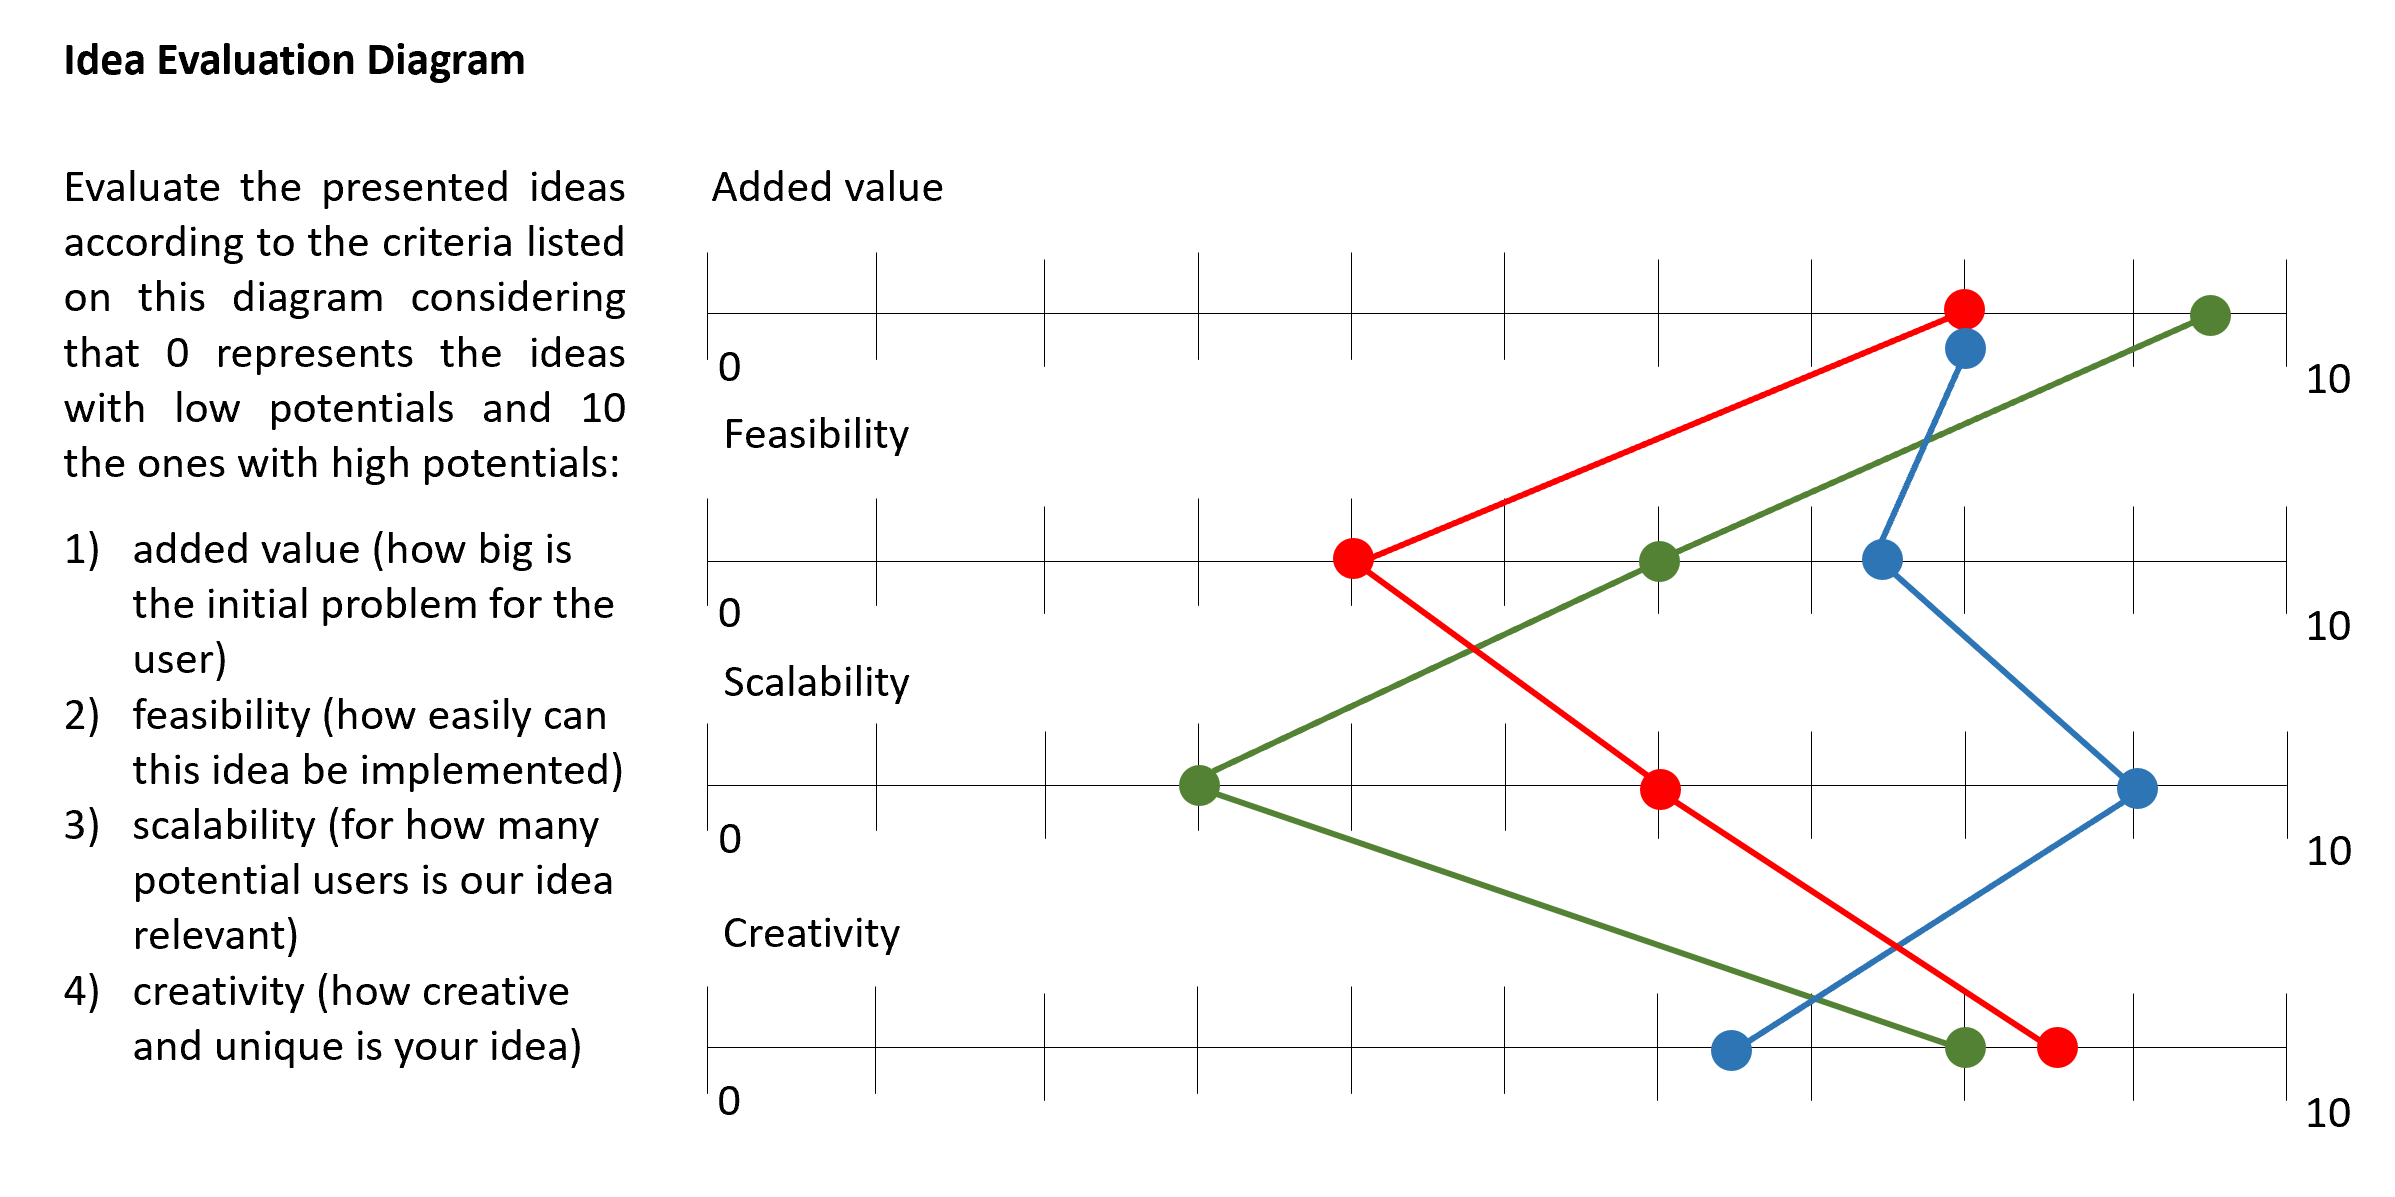
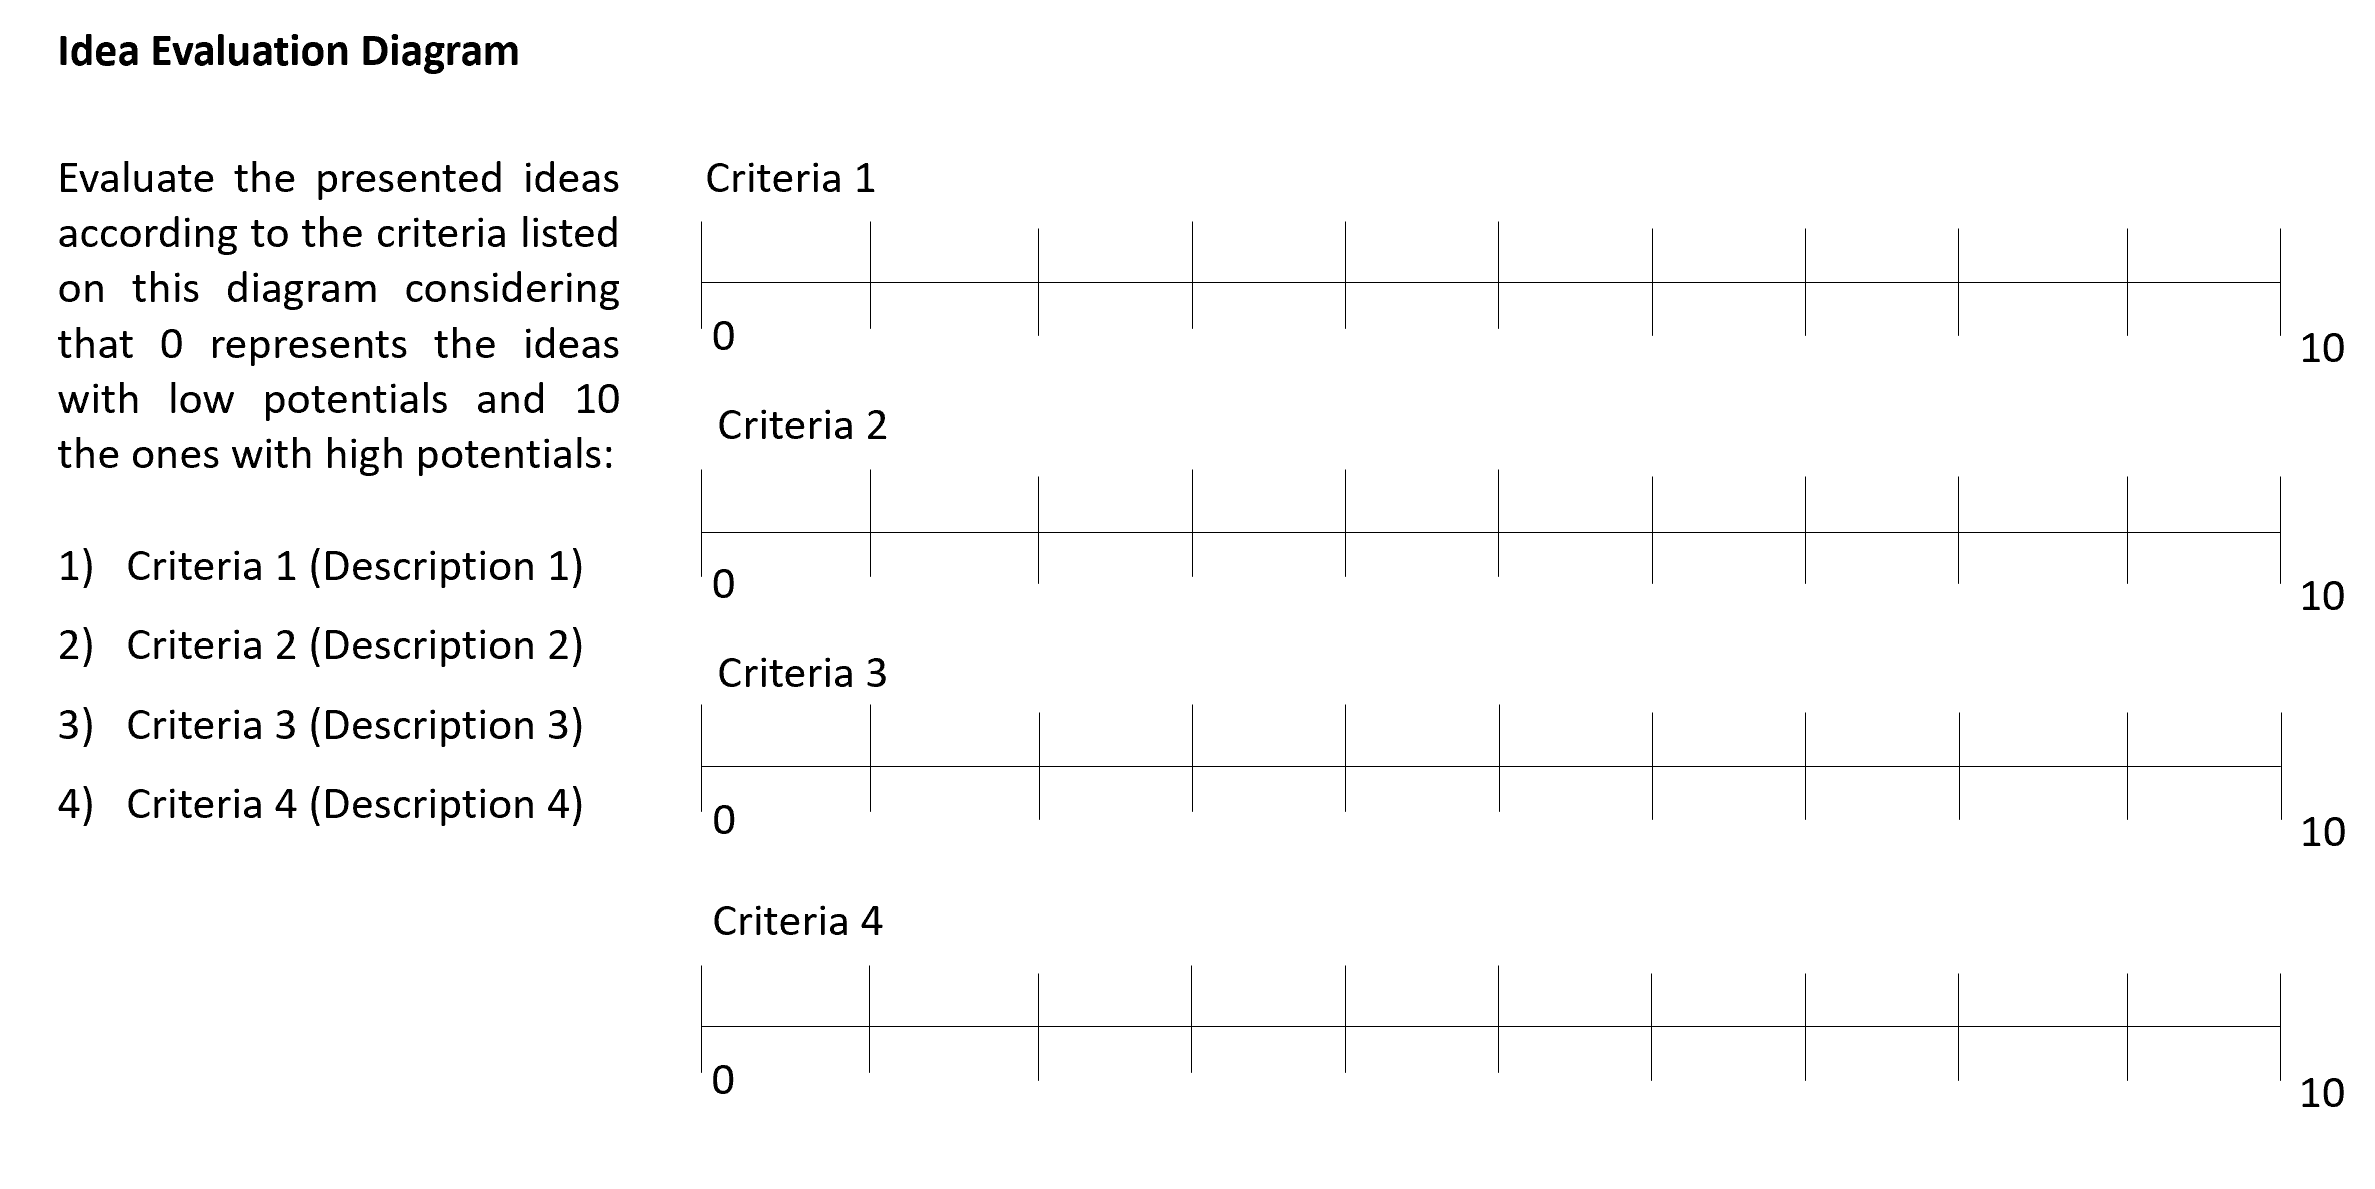
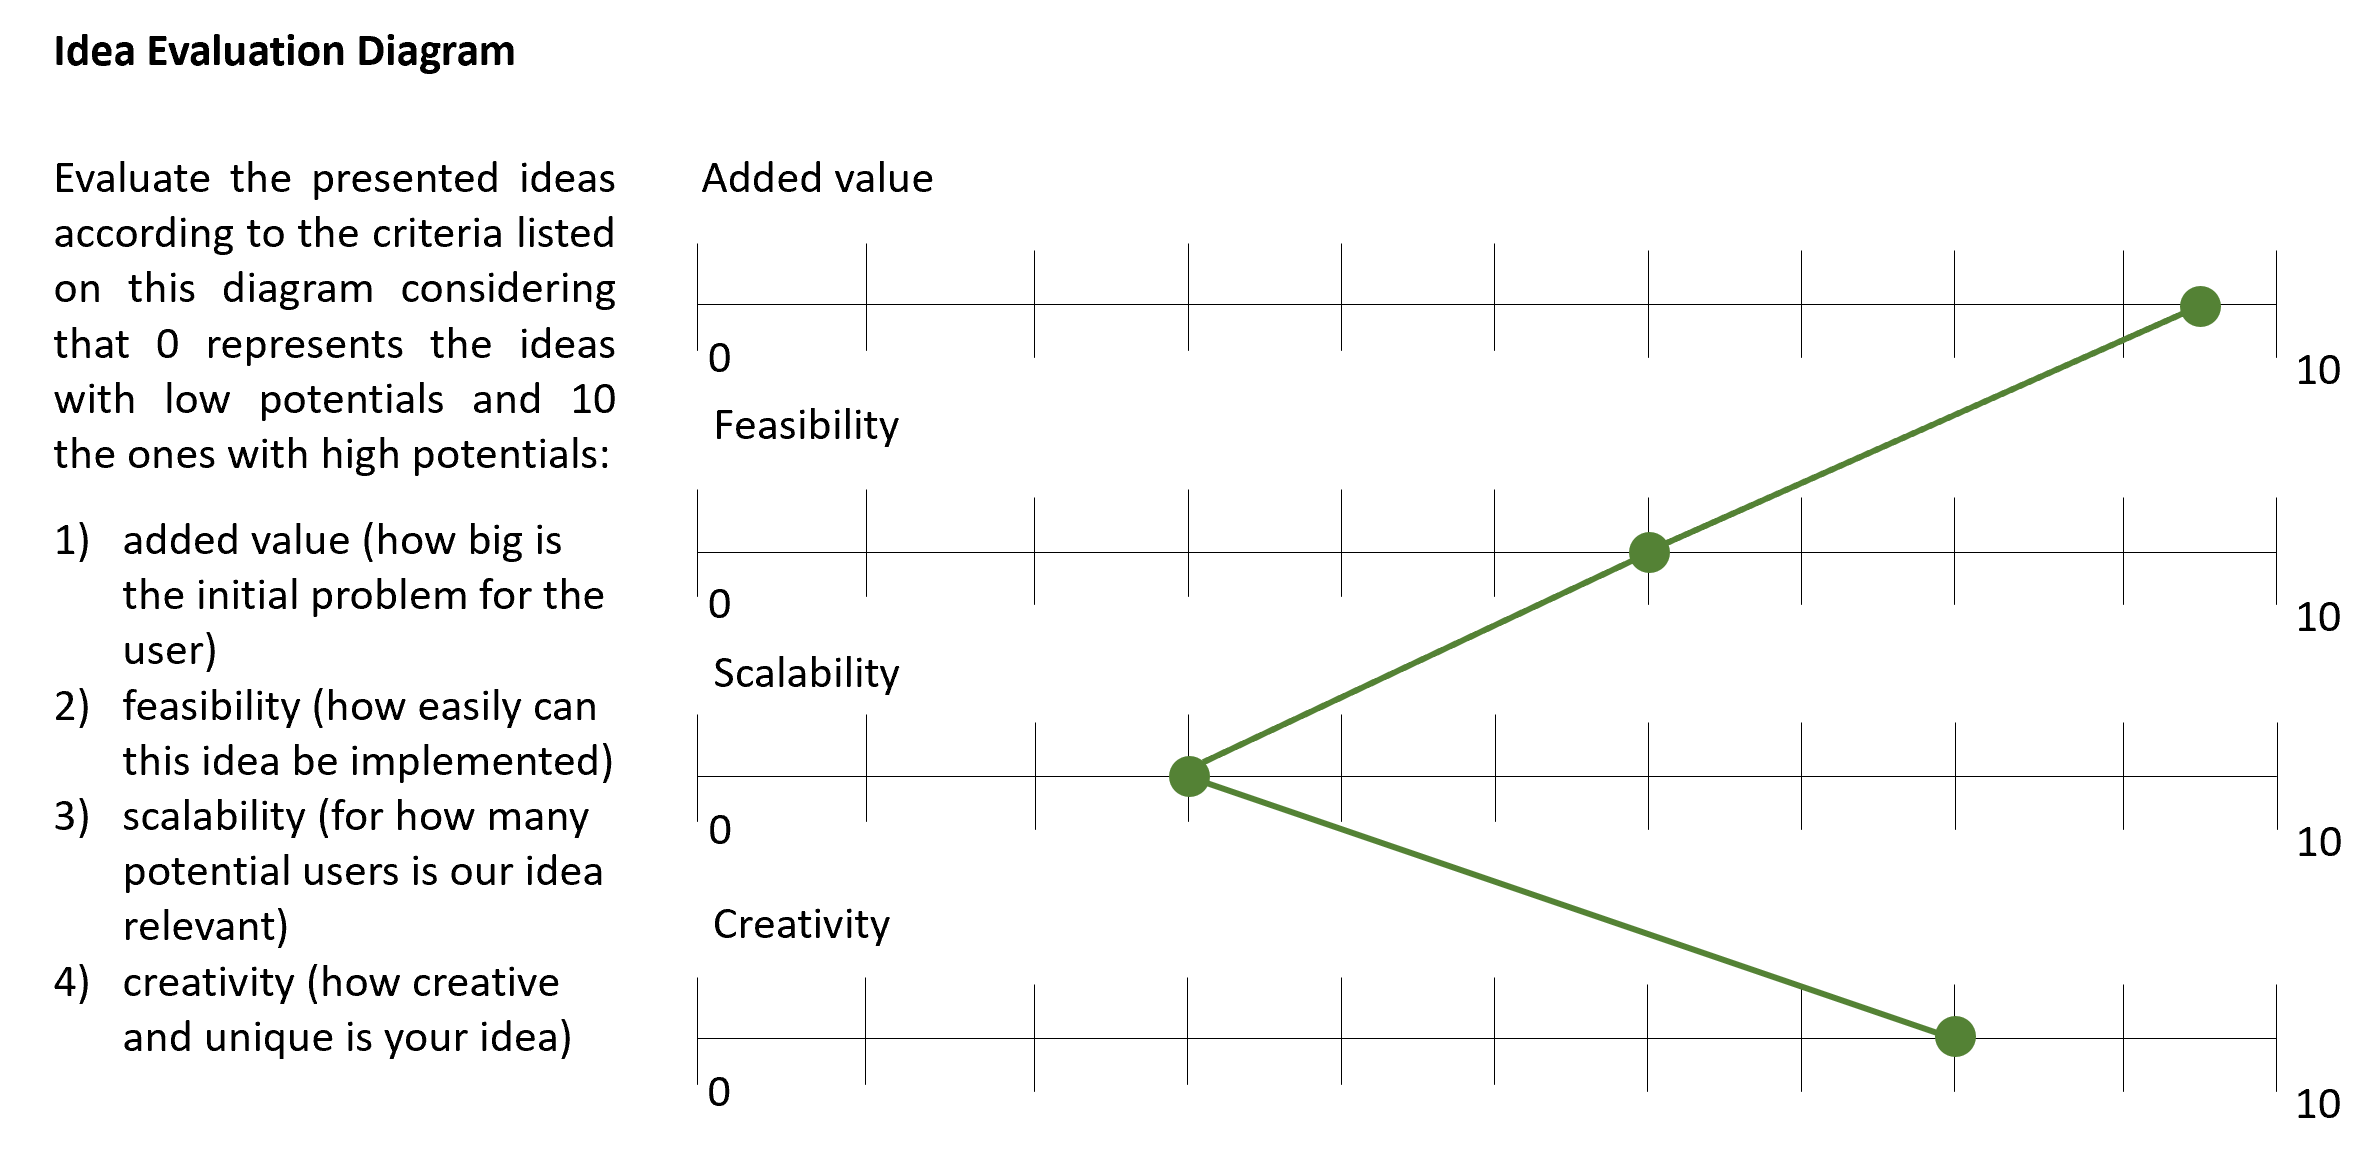
There are many approaches to facilitate the ideation sessions, some depend on ideation techniques such as Sketching, Brainwrite, SCAMPER,etc. To this day however, the Brainstorming is still one of the most popular ones. The main idea of a brainstorming session is to provide the participating expertise with space, other people, and tools to start a collaborative design thinking process and develop potential solutions. As potential ideas for your project emerge, it would be good to visualize the proposed suggestions. You can use whiteboards or mind maps that illustrate the characteristics, strengths, and weaknesses and evaluate each idea against the other ones using predefined techniques and criteria, such as the Idea Evaluation Diagram. You will have to keep repeating the process of discussing and evaluating until you can make a final selection to see which ideas solve your end-users’ problem.
It is crucial to take your time in this stage and to keep reflecting on your developed ideas to make sure that you are not limiting your options due to your assumptions and/or misconceptions. Also note that the sky is your limit in the ideation stage, all ideas are welcomed, no matter how crazy they might sound. No project is misguided or wrong until proven otherwise!
Download our Idea Evaluation Diagram Template and start testing your own criteria!
By now you have finally reached a point where you can test the ideas you developed for your project and identify which of them present the best possible solution for your target group/s. From now on, it will all about being experimental. So, what is a prototype? And how can you make the most of it? Let’s find out.
A prototype is a small-scale cheap version of your solution that gives the end-users the first impression of your project and allows them to better understand its functions and objectives. The main purpose of developing a prototype is testing and investigate how relevant it is to the context, needs, and situation of your targeted end-users. In other words, a prototype is like a hypothesis that needs to be tested to see whether it is effective and can deliver on the promise.
Generally, developers tend to use two common strategies when designing their prototypes known as Concept Prototype and Working Prototype. Concept prototype is all about producing an early sample/model/sketch/release of your project to test its main concept and its impact on the targeted problem. For example, the concept prototype can be Models of the presented solution built with cardboards and scrap material, digital mock-ups and simulations, surveys that use public forums to collect feedback, etc. Whereas the Working Prototype is all about building/preparing an early working sample/model/release of your project to offer it to your end-users for testing and to your potential investors and marketing companies to raise funds for building a full-scale version of it.
Prototyping on its own won’t get us anywhere if we do not put it to the test. Scroll down to learn more about the last stage of the User-Centred Design Process: Test.
Prototyping and testing always go hand-in-hand when validating a solution against a specific problem on the ground. The main purpose of this stage is to: a) learn if your proposed project actually works or has the potential to work, b) build a solid knowledge of the end users’ feelings, thoughts, behaviours, and acceptance towards your solution, c) test the relevance and impact of your project on the actual problem in the specified context, and d) consolidate comprehensive data that shows you the ramifications, roadblocks, expectations, or opportunities that your project might face when launched at a full scale. By the end of this stage and according to all of the above-mentioned results, a prototype can be either: 1) be accepted by the end-users as it is, 2) require slight to major improvements, or 3) need to be completely rethought. This stage is therefore very iterative since it requires you to test and fail and learn from your failings until you reach a point where you have the best version possible of your project which is perfectly aligned to the end-users needs, expectation,situation and context.
The User-Centred Design process is an iterative cycle that is interchangeable according to your progress between the five different stages. Sometimes you will need to recheck the relevance and accuracy of your definition of the problem, other times you might notice that some crucial information about the context of the end-users is still missing in your research so you go back to the Empathise stage. The prototyping and testing stages might show some serious gaps in your ideation strategy that you need to address. This is exactly why the User-Centred Design approach is so powerful. It requires you to be adaptable, motivated, creative, and to keep challenging yourself to deliver the best outcome while collaborating closely with your end-users throughout the various stages.
If you are keen to practice the knowledge you gained in the 3.2 and 3.3 factsheets and apply it to one of the biggest problems faced by the water sector today, go ahead and download this worksheet!
Go to next topic!
3.4 Sustainable Business Model Canvas
5 Stages in the Design Thinking Process.
The Field Guide to Human-Centred Design
Part of the IDEO mission is to spread human-centred design to social sector practitioners around the world. The Field Guide to Human-Centred Design reveals our process with the key mindsets that underpin how and why we think about design for the social sector, 57 clear-to-use design methods for new and experienced practitioners, and from-the-field case studies of human-centred design in action.
Licence (CC BY-NC-ND 3.0)
IDEO.org (2015): The Field Guide to Human-Centred Design. Canada: URL [Accessed: 23.07.2018] PDFDesign Thinking as Strategy for Innovation
Introduction to design thinking as method to creatively solve problems and come up with ideas for improving products and service delivery.
NAIMAN, L. (2016): Design Thinking as Strategy for Innovation. Vancouver: Creativity at Work URL [Accessed: 23.07.2018]Eight Practical Steps to Design for the Market
This blog post provides insights on how to develop radically innovative products and services for the poorest people around the globe. It provides additionally eight steps to help designing a branding and marketing strategy and a last mile supply chain that will put a product in the hands of a million or more customers.
POLAK, P. (2016): Eight Practical Steps to Design for the Market. URL [Accessed: 23.07.2018]Design Thinking for Social Innovation
The article introduces design thinking as concept and provides case studies on how the design methodology has been applied in practice.
BROWN, T. and WYATT, J. (2010): Design Thinking for Social Innovation. URL [Accessed: 23.07.2018]